Part 3 of 10
Here's something that trips up almost everyone new to Claude Code: they start using it on a project, get mediocre results, and assume it's just not that good. But then they see someone else get amazing results on a similar codebase. What's the difference?
Configuration.
A well-configured Claude Code session doesn't just understand your code—it understands your patterns, your conventions, your team's preferences. It knows that you use Bun instead of npm, that API routes live in app/api/, and that your team has strong opinions about error handling. This chapter shows you how to set that up.
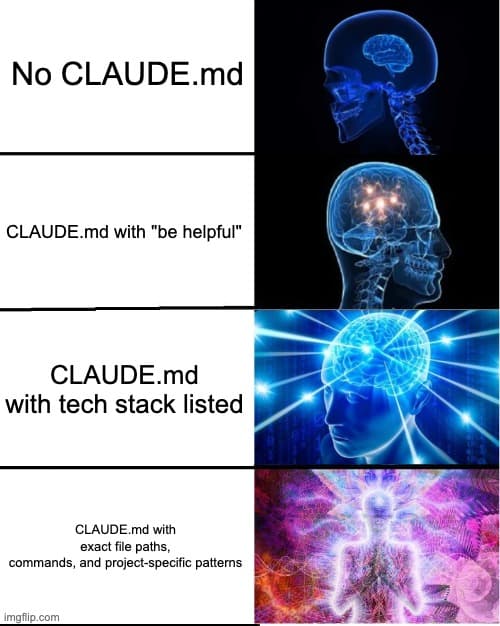
CLAUDE.md: Your Project's Memory
CLAUDE.md is automatically loaded when Claude Code starts. Think of it as the instruction manual you hand to a new developer on their first day—except Claude reads it every single session.
Where to Put It
Claude Code uses a hierarchical system for loading CLAUDE.md files:
Project root (most common):
Your-project/CLAUDE.md
Check it into git. Share it with your team. This is what you want 90% of the time.
Alternative location:
Your-project/.claude/CLAUDE.md
Same effect, but keeps your project root cleaner.
Global (applies to all projects):
~/.claude/CLAUDE.md
Personal preferences that follow you everywhere. Good for things like "I prefer tabs over spaces" or "always use TypeScript strict mode."
Local variant (gitignored):
Your-project/CLAUDE.local.md
Personal tweaks you don't want to commit. API keys, experimental settings, or that controversial coding style your team doesn't share.
Monorepo Support
Here's where it gets clever. In a monorepo, you might have:
Monorepo/├── CLAUDE.md # Loaded for everything├── apps/│ ├── web/│ │ └── CLAUDE.md # Loaded when working in web/│ └── api/│ └── CLAUDE.md # Loaded when working in api/└── packages/└── shared/└── CLAUDE.md # Loaded when working in shared/
When you run claude from monorepo/apps/web, both the root CLAUDE.md and the web-specific one get loaded. Child directory CLAUDE.md files are pulled in on-demand when you work with files in those directories.
What to Put in CLAUDE.md
A good CLAUDE.md answers three questions:
WHAT — What is this project? What's the tech stack? What's the directory structure?
WHY — What's the purpose? What problem does it solve? What are the key business concepts?
HOW — How do you work on it? What commands run tests? What's the deployment process? How do you verify changes?
A Practical Template
# Project NameOne sentence: what this is and what it does.## Tech Stack- Next.js 14 (App Router)- TypeScript (strict mode)- Tailwind CSS- Prisma + PostgreSQL- Jest for testing## Directory StructureSrc/├── app/ # Next.js routes├── components/ # Reusable UI components├── lib/ # Utilities and helpers├── services/ # Business logic└── types/ # TypeScript interfaces## Commands- `bun dev` - Start development server (port 3000)- `bun test` - Run Jest tests- `bun lint` - ESLint check- `bun build` - Production build- `bunx prisma studio` - Database GUI## Coding Conventions- Use path aliases (@/components, @/lib, @/services)- Server components by default, 'use client' only when needed- All functions must have typed parameters and return types- Keep methods small with single responsibility- Tests colocated with components (Component.test.tsx)## Important Notes- Never commit .env files- Run `bunx prisma generate` after schema changes- API routes use Zod for runtime validation- Authentication uses NextAuth with JWT strategy
Framework-Specific Examples
Next.js App Router:
## Next.js Conventions- Server Components by default- Use 'use client' only for useState, useEffect, event handlers- Data fetching: direct DB calls in Server Components, SWR in Client- API Routes: app/api/[route]/route.ts- File naming: PascalCase components, camelCase utilities
Python FastAPI:
## FastAPI Conventions- Type hints on all functions- Async/await for I/O operations- Pydantic v2 models for request/response validation- Dependency injection for services- Alembic for migrations: `alembic upgrade head`
Go:
## Go Conventions- Standard project layout (cmd/, internal/, pkg/)- Use interfaces for testability- Error wrapping with fmt.Errorf and %w- Tests in same package with _test.go suffix- Run `go test ./...` before commits
The Import System
CLAUDE.md files can import other files using the @path/to/file syntax. This keeps your main file lean while still providing comprehensive context.
# Project OverviewSee @README.md for detailed project description.See @docs/api-patterns.md for API conventions.See @docs/testing-guide.md for testing requirements.## Quick Reference@package.json shows available npm scripts.
How imports work:
- Relative paths resolve from the CLAUDE.md file's location
- Imports can be recursive (up to 5 levels deep)
- Code blocks are excluded (imports inside ``` aren't evaluated)
- Later imports take precedence over earlier ones
Organizing with rules directory:
For larger projects, you can split instructions into multiple files:
.claude/├── CLAUDE.md # Main file└── rules/├── coding-style.md├── testing.md├── security.md└── deployment.md
All .md files in .claude/rules/ are automatically loaded as project memory.
The # Key Shortcut
Here's a productivity tip most people miss: during any Claude Code session, press # to add instructions to your CLAUDE.md on the fly.
Found yourself repeating the same instruction? Press # and add it permanently. Claude will remember next time.
Settings.json: Permissions and Automation
Beyond CLAUDE.md, you can configure Claude's behavior with settings files.
File Locations
~/.claude/settings.json # Global (all projects).claude/settings.json # Project (committed to git).claude/settings.local.json # Local (gitignored)
Settings merge in order of precedence: local > project > global.
Permissions Configuration
Control what Claude can do without asking:
{"permissions": {"allow": ["Read(./src/**)","Read(./tests/**)","Bash(git status)","Bash(git diff)","Bash(bun test:*)","Bash(bun lint)"],"deny": ["Read(./.env)","Read(./.env.*)","Read(./secrets/**)","Bash(rm *)","Bash(git push *)"]}}
How rules are evaluated:
- Deny rules are checked first (block regardless of other rules)
- Allow rules are checked next (permit if matched)
- Everything else prompts for approval
The deny list is your security boundary. Files matching deny patterns become completely invisible to Claude—it can't even see they exist.
Hooks: Automated Actions
Hooks run commands at specific points in Claude's lifecycle:
PreToolUse — Before Claude uses a tool (can block the action)
PostToolUse — After a tool completes (great for formatters)
SessionStart — When a session begins (setup environment)
Notification — When Claude sends notifications
Stop — When Claude finishes responding
Example: Auto-format Python files after edits:
{"hooks": {"PostToolUse": [{"matcher": "Write","hooks": [{"type": "command","command": "if [[ \"$CLAUDE_FILE_PATH\" == *.py ]]; then black \"$CLAUDE_FILE_PATH\"; fi"}]}]}}
Example: Prevent modifications to production configs:
{"hooks": {"PreToolUse": [{"matcher": "Write(./config/production.*)","hooks": [{"type": "command","command": "echo 'Blocked: Cannot modify production config' && exit 1"}]}]}}
Tip: You can also configure hooks interactively using the
/hookscommand during a session.
Team Configuration
For teams, here's what to commit vs. Gitignore:
Commit these (shared with team):
CLAUDE.md— Project instructions everyone should follow.claude/settings.json— Shared permissions and hooks.claude/rules/— Organized instruction files.claude/commands/— Team slash commands (covered in Part 4)
Gitignore these (personal):
CLAUDE.local.md— Your personal preferences.claude/settings.local.json— Your local overrides
This lets teams enforce standards while individuals can customize their experience.
Best Practices That Actually Matter
Keep It Lean
Research suggests frontier LLMs can reliably follow around 150-200 instructions. Beyond that, adherence drops. Smaller models handle even fewer.
Don't do this:
## General Guidelines- Write clean code- Follow best practices- Use meaningful variable names- Keep functions small
Claude already knows these things. You're wasting precious instruction space on generic advice.
Do this instead:
## Project-Specific Rules- Error responses use the ApiError class from @/lib/errors- All dates stored as UTC, displayed in user's timezone- Feature flags checked via @/lib/features.isEnabled()- Log format: [LEVEL] [SERVICE] [REQUEST_ID] message
Only include what's unique to your project.
Iterate Like a Prompt
Your CLAUDE.md is part of Claude's prompt. Treat it like one.
- Test whether instructions actually change behavior
- Add emphasis for critical rules: "IMPORTANT:" or "YOU MUST"
- Remove instructions that aren't being followed
- Run it through Claude's prompt improver occasionally
At Anthropic, they tune CLAUDE.md files the same way they tune prompts—continuous iteration based on what actually works.
Use /init as a Starting Point
Running /init generates a CLAUDE.md by analyzing your project. But it's a starting point, not a finished product.
The auto-generated version captures obvious patterns (tech stack, directory structure, common commands) but misses your team's tribal knowledge. Review what Claude produces and add what matters most to how you actually work.
Run /init again after major features or refactors to pick up new patterns.
Testing Your Configuration
After setting up your CLAUDE.md, verify it worked:
Claude
Then ask:
Summarize the project configuration and conventions you understand.What tech stack is this? What commands should you use for testing?
If Claude misses something important, your CLAUDE.md needs work.
What's Next
You now know how to configure Claude Code for your specific project. But configuration only goes so far—the real power comes from extending Claude with custom commands.
In Part 4: Custom Commands, we'll build slash commands that encode your workflows into reusable actions. Think of it as teaching Claude your team's shortcuts.
File locations
CLAUDE.md — Project root (recommended)
.claude/CLAUDE.md — Alternative
~/.claude/CLAUDE.md — Global
CLAUDE.local.md — Local (gitignored)
.claude/rules/ — Additional rule files
Settings files
.claude/settings.json — Project
.claude/settings.local.json — Local overrides
~/.claude/settings.json — Global
Key features
@path/to/file — Import syntax
# key — Add instructions during session
/init — Generate/update CLAUDE.md
/hooks — Configure hooks
Stay Updated
Get notified about new posts on automation, productivity tips, indie hacking, and web3.
No spam, ever. Unsubscribe anytime.